
Getting started#
The viewer shows brain images, tractograms, FODs and peaks in three 2D views and a 3D view.
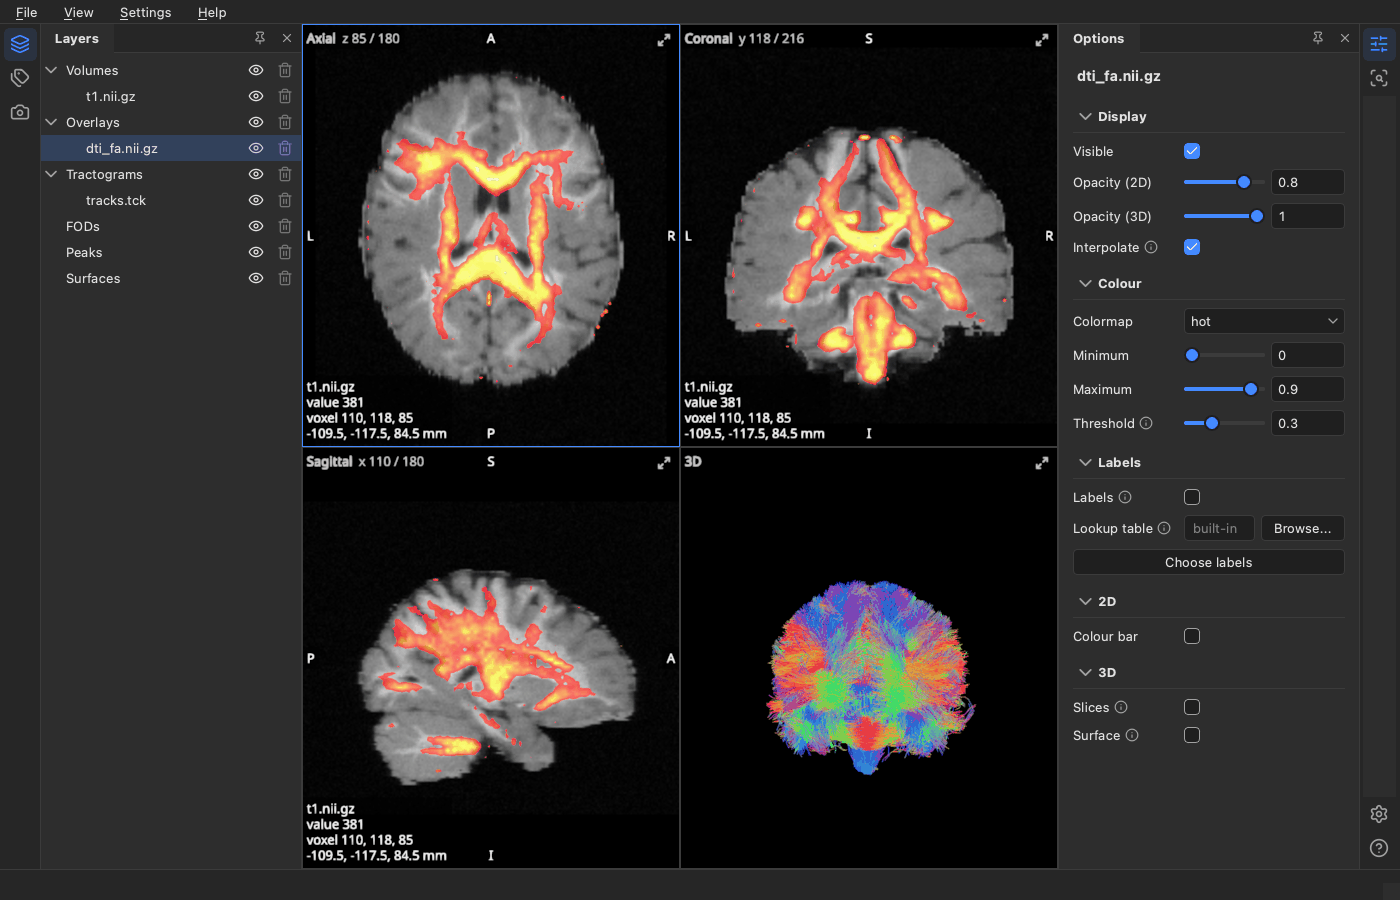
The pictures in these guides show the simulated brain of the ISMRM 2015 Tractography Challenge (Maier-Hein et al., Nature Communications 8 (2017) 1349; https://doi.org/10.5281/zenodo.572345, CC BY 4.0): its T1-like image, and the DTI maps, FODs, peaks and tractogram that Larmor made from its diffusion data. The data has no FreeSurfer surfaces or parcellation, so the tissue labels and surfaces shown were made from simple masks of the T1-like image.
Opening files#
From the command line:
lar bv -v t1.nii.gz -o mask.nii.gz -t tracts.tck -f fod.mif -p peaks.nii.gz. Each option is a category (-vvolumes,-ooverlays,-ttractograms,-fFODs,-ppeaks); repeat it for several files. Files given without an option go by their names: tractograms to Tractograms, a session (.lar.json) is opened, other.jsonfiles (such as BIDS sidecars) are skipped, and the rest go to Volumes:lar bv t1.nii.gz tracts.tck.From the file manager, once the launcher is added (below): open a file with BrainViewer, or drop it on the viewer’s icon in the Dock (macOS).
File > Open (Ctrl+O, Cmd+O on macOS): choose the files; the file type at the bottom of the dialog sets their category.
Drag and drop: drop files onto a category’s row in Layers, or onto one of its items. The rows the files would go into are highlighted; files the category cannot read are refused.
From Python:
from larmor.viewer import view, thenview(volumes="t1.nii.gz", tracts="tracts.tck").
Images are read from NIfTI (.nii, .nii.gz) and MRtrix (.mif, .mif.gz, .mih) files, tractograms from
.tck, .trk, .vtk and .fib files, also gzipped. Files are read in the background: the status bar shows
the progress and a Cancel button. A tractogram with more streamlines than the read limit (1,000,000 by
default, see Settings) is reduced to a random subset, the same one each time.
Installing it for the viewer only#
People who only want the viewer install Larmor as a tool of its own with uv, which
also brings the Python it needs and puts lar on the PATH:
uv tool install "larmor-dmri[viewer]"
pipx install "larmor-dmri[viewer]", or pip install "larmor-dmri[viewer]" in an environment of your own,
work too. Until Larmor is on PyPI, install it from a clone of its repository, run in the clone (this compiles its
C++ module, so it needs a C++ compiler; on macOS, xcode-select --install):
uv tool install ".[viewer]"
Starting it from the desktop#
Once, from a terminal, add the launcher:
lar bv --install-launcher
It starts the install that ran the command, so run it again after moving or reinstalling Larmor. It adds:
macOS:
~/Applications/BrainViewer.app, in Launchpad and Spotlight; keep it in the Dock with Options > Keep in Dock. Finder’s Open With offers it for.nii,.nii.gz,.mif,.mih,.tckand.trkfiles; as macOS matches only the last part of a name, it is offered for every.gzfile too.Linux: a BrainViewer entry in the application menu (
~/.local/share/applications/larmor.brainviewer.desktop), its icon, and the file types it opens, so that the file manager offers it for NIfTI, MRtrix,.tckand.trkfiles. Pin it to the dock or taskbar from the menu.Windows: a BrainViewer shortcut in the Start menu; pin it to Start or the taskbar from its right-click menu. Files dropped on the shortcut open in the viewer; Explorer’s Open With does not list it.
.vtk and .fib tractograms open from the command line and File > Open, but are not registered with the file
manager, as .vtk is a generic format of many programs.
It never writes over a file it did not add: if one is already there, such as a BrainViewer.app from another
program, it stops and names it, and you move or remove it first. Its own files carry a mark, so they are known as
its own even if the settings folder, which lists them, was deleted.
lar bv --uninstall-launcher removes exactly what was added, listing each file, and the folders it made once
they are empty. To remove the viewer itself, remove the launcher first, then the tool:
lar bv --uninstall-launcher
uv tool uninstall larmor-dmri
(pipx uninstall larmor-dmri for pipx.) What is then left are the viewer’s settings, in
~/Library/Application Support/larmor (macOS), ~/.config/larmor (Linux) or
%APPDATA%\larmor (Windows); delete that folder too to leave nothing behind.
Panels#
The panels sit beside the views, and a stripe of icons on each edge of the window opens and closes them: Layers (Ctrl+1), Labels (Ctrl+3) and Screenshots (Ctrl+Shift+S) on the left; Options (Ctrl+2), Inspect FOD (Ctrl+4), Settings (Ctrl+,) and Help (F1) on the right. On macOS, Cmd takes the place of Ctrl. Click an icon to open its panel, and again to close it; the views take the room the panels leave. Ctrl+0 hides all the panels and brings them back. Hover over an icon to see its name and key; View > Panels lists them too.
The pin at the top of a panel lets it auto-hide: it then slides out over the views when its icon is clicked, and back when the views are clicked. Click the pin again to keep it beside the views. Panels can also be dragged by their title to the other side or above one another. The viewer remembers which panels are open, where and how large, and opens them the same way next time.
Layers and Options#
Layers, on the left, lists the loaded items by category: Volumes, Overlays, Tractograms, FODs and Peaks. Each row has an eye, which shows or hides it, and a cross, which removes it. A category’s eye and cross act on all its items.
Options, on the right, shows the options of what is selected in Layers. Select an item to change it alone, or a category to change all its items at once; a field shows “mixed” where they differ. Double-click an item or a category to bring up Options when it is closed or auto-hidden. A single click opens it too while no panel is open on the right; with another right panel open, such as Inspect FOD, a single click leaves the panels as they are. The options come in sections, such as Display, Colour and 3D; click a section’s title to fold it away, and it stays folded for that kind of item. Options marked (2D) or (3D), or in a 2D or 3D section, apply to those views only.
The four views#
The axial, coronal and sagittal views each show a slice through the crosshair, and the 3D view shows the scene in 3D: see The 2D views and The 3D view. Help > Shortcuts lists every key and mouse control.
Agents#
An agent, such as Claude Code, can drive the viewer through MCP: it loads files, changes options, moves the cursor and takes screenshots while you watch. Driving the viewer from an agent shows how to connect one.